Open Clear Buster 10 Man Ride


The Open Clear Buster 10 Man Ride is a more advanced ride that is the perfect counter to a team that has shown they can beat a 3-3 Zone Ride with an Open Clear. The objective of this ride is to cover the areas of the field where teams like to throw easy passes by pushing players forward and allowing the clearing team to have the extra man advantage near our goal instead of near their goal as we traditionally do when we are riding. Without the experience and preparation to beat this zone opposing teams are likely to really struggle clearing the ball and likely commit many turnovers, just make sure you know when to drop out of it and hope they don’t score on a 70 yard shot against an open goal.
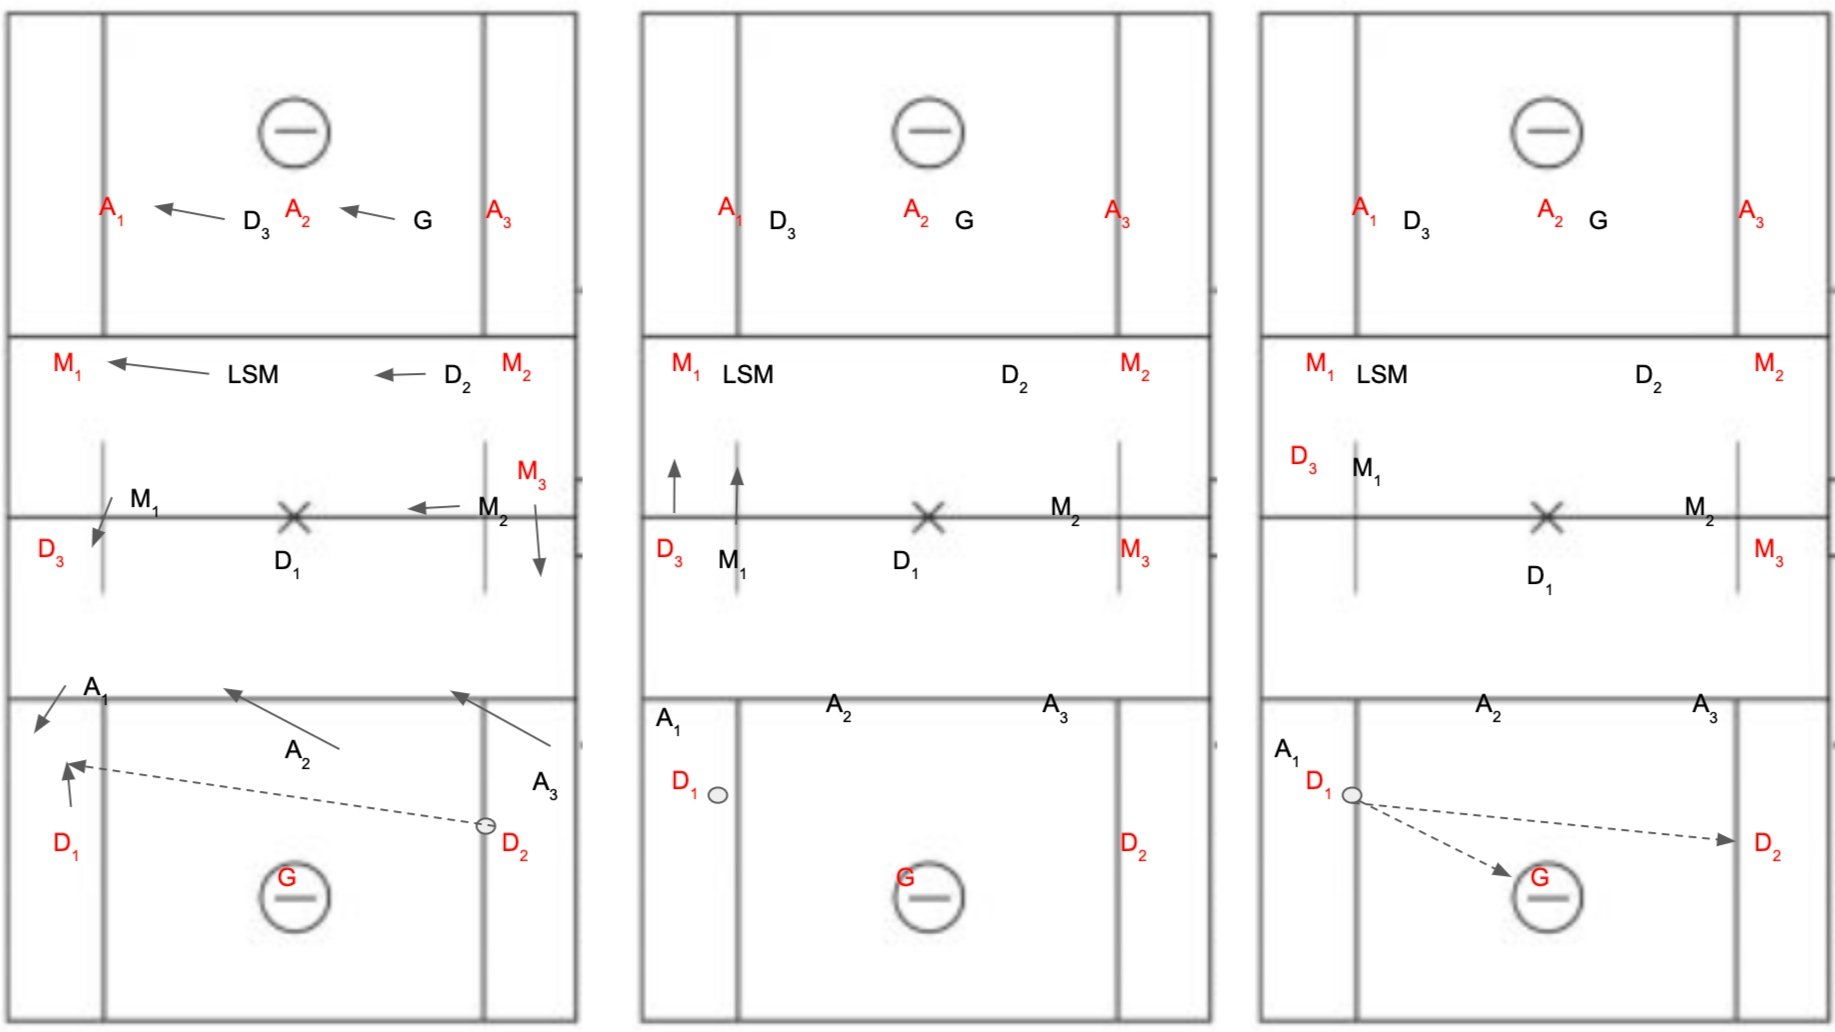
How It Works
The attackmen each cover ⅓ of the field between the goal and restraining line. The midfielders each cover ⅓ of the field between the restraining line and midfield line (note, I like to put my most athletic pole in the middle of the field, this is accomplished while we are subbing, by having the LSM immediately cover the lower spot on the field when they run on and D1 moving up to the middle spot), LSM and D2 cover between the midfield line and far restraining line, and D3 and G cover between restraining line and the goal.
As the ball is passed to one side of the field each line will shift towards that side of the field. The backside attackman does not need to shift back like in a 3-3 zone because they are not responsible for the area between restraining line and midfield, only what happens in front of the restraining line.
As they start the clear, the attackman can put as much pressure on the poles as you would like, I like to allow the first pass towards the box and then increase the pressure after the first over pass (Image 4)
At this point (Image 5) you can see we are essentially leaving the furthest player from the ball open A3
Aside from trying to dodge (which will be very hard because we can funnel any ball carriers to D1) D1has 4 options- throwing back to G or D2 (Image 6), long throw to A3 (Image 7), or D2 getting behind A (Images 8-9), and shooting (either for a goal or to back up).
Utilizing This Ride
As with any 10 man ride, there is the risk of giving up an easy goal in transition if the ride is broken quickly but if used correctly it puts a lot of pressure on the clearing team, both physically and mentally.
You can get creative with how you use the player in the very middle of the field. As mentioned I like to put my most athletic pole there because that player can cause a lot of havoc on the field. Determining their role will greatly affect how you run this clear. Do you want to let them sit back and watch for midfielders cutting across the middle? Do you want to purposefully have the attackman funnel the ball carriers into a double team? Try it different ways and see what works for you.